Install And Configure Syncthing
Syncthing replaces proprietary sync and cloud services with something open, trustworthy and decentralized. Your data is your data alone and you deserve to choose where it is stored, if it is shared with some third party and how it’s transmitted over the Internet.
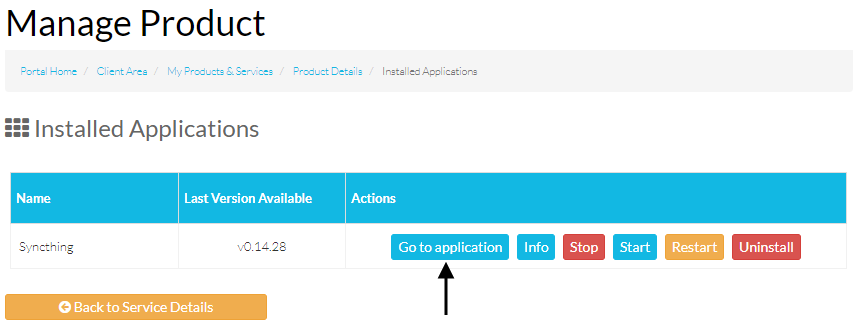
Syncthing can be installed in the client area at Services > Click the green Active Button > Applications.

Once installed Syncthing can be accessed on the Installed Applications page at Services > Click the green Active Button > Installed Applications.
Once you access Syncthing you will notice that its not secured by a username and password so the first step will be to secure the Syncthing GUI.
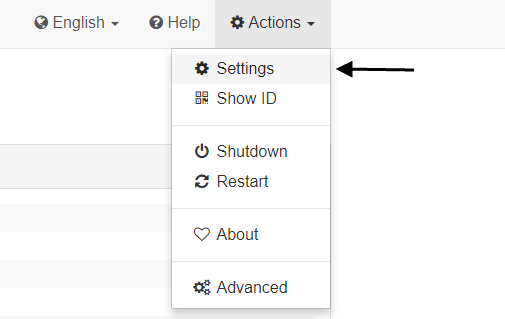
In the top right hand corner of Syncthing you will see an Actions button if you click this a drop down menu will appear where you need to select the settings option.
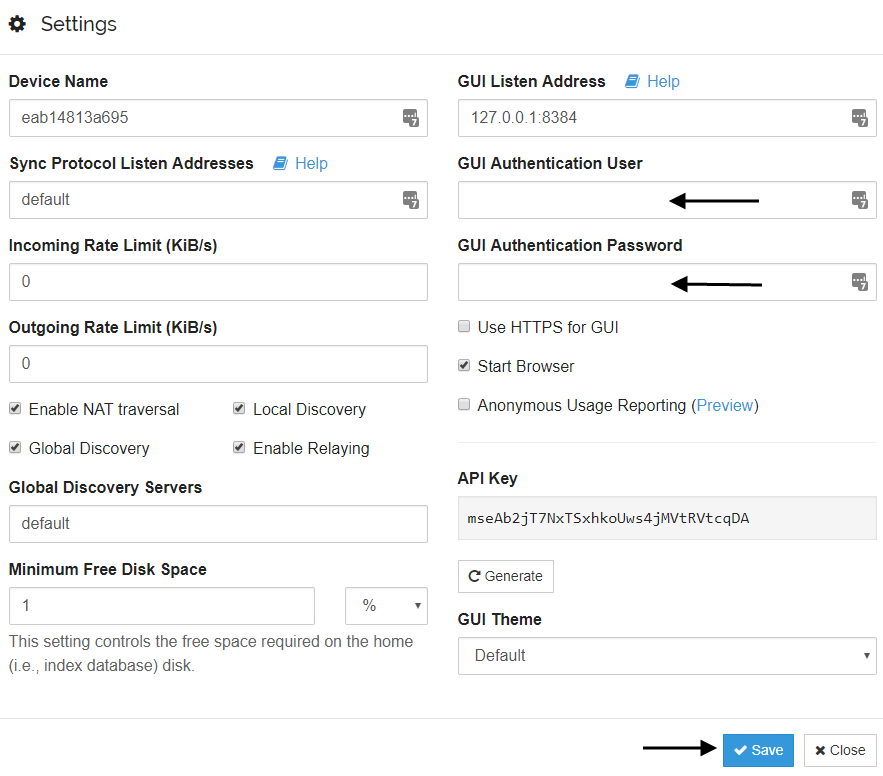
Now you need to add a username and password which will be used to login to the Syncthing GUI and then click Save.
Please note do not change the GUI Listen Address, changing this will mean the Syncthing GUI cannot be accessed.
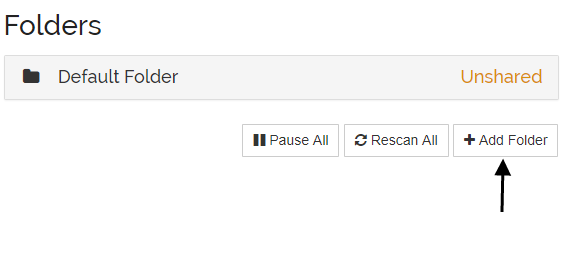
Syncthing is installed with one folder already setup this is called the default folder, this is folders download location is /config/Sync which is mounted to the /Apps/Syncthing/Sync folder.
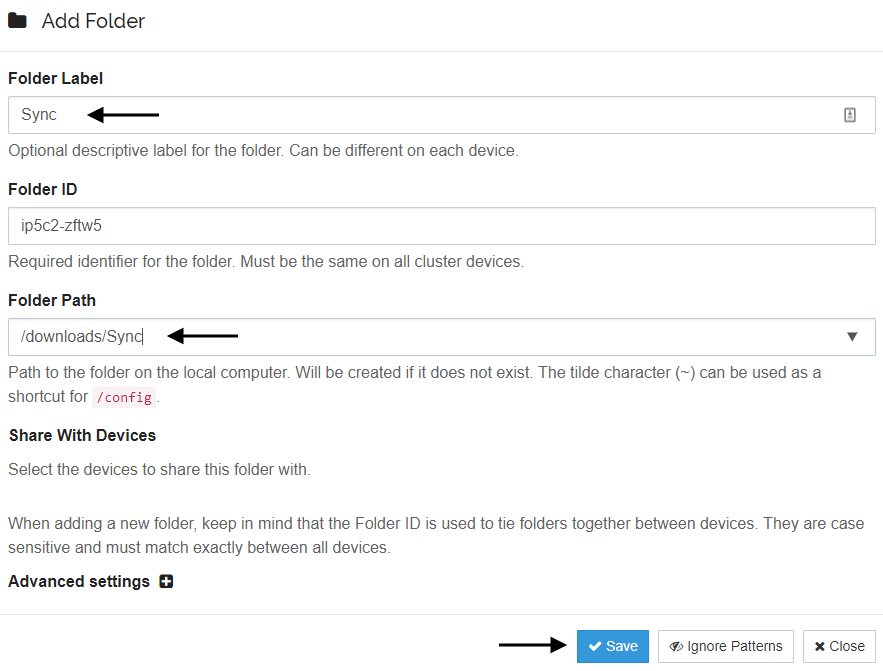
If you want to add another folder click the add folder button
Your download folder is mounted as /downloads so if you was going to use a folder named Sync inside your download folder you would use /downloads/Sync as the folder path.
Enter the Folder Label the Folder Path and click Save to add the additional folder.
If you want to link your seedbox Syncthing to your local Syncthing you need to ID this can be found by going to Actions > Show ID

Then in your local Syncthing go to Add Remote Device and add your ID and select the folder you want to sync and click save.
